This is the programmer's leisure time series!
测试环境:
- Ubuntu 14.04
Install Samba
- 安装 Samba
sudo apt-get install samba
- 安装系统设置的共享模块
sudo apt-get install kdenetwork-filesharing
Configuration
- 创建共享目录(我直接把共享文件夹放到sdu用户根目录下面了,放在其他地方也是可以的,大家按需设置😀)
mkdir /home/sdu/share
- 设置该文件夹的权限使其让所有用户可读可写可运行
chmod 777 /home/sdu/share
- 打开 samba 配置文件(建议先备份再修改,养成系统使用好习惯,在关键的时候你会发现当初的备份是多么的明智!😂)
sudo cp /etc/samba/smb.conf /etc/samba/smb.conf_backup
sudo vim /etc/samba/smb.conf
- 编辑 samba 配置文件(将下面几行代码放到配置文件尾部,我这配置的是在局域网下任何人都可以访问。vim 下 shift + g 可以跳转到文件尾部)
[Share]
comment = Shared Folder with everybody
path = /home/sdu/share
public = yes
writable = yes
create mask = 0777
directory mask = 0777
force user = nobody
force group = nogroup
available = yes
browseable = yes
- 测试并重启samba(执行 sudo testparm 后,会打印如下类似信息,如果没有任何error,说明我们已经安装并配置成功了。🍻)
sudo testparm
sdu@ubuntu:~$ sudo testparm
Load smb config files from /etc/samba/smb.conf
rlimit_max: increasing rlimit_max (1024) to minimum Windows limit (16384)
WARNING: The "syslog" option is deprecated
Processing section "[printers]"
Processing section "[print$]"
Processing section "[Share]"
Loaded services file OK.
Server role: ROLE_STANDALONE

Press enter to see a dump of your service definitions

# Global parameters
[global]
	workgroup = MSHOME
	server string = %h server (Samba, Ubuntu)
	server role = standalone server
	map to guest = Bad User
	obey pam restrictions = Yes
	pam password change = Yes
	passwd program = /usr/bin/passwd %u
	passwd chat = *Enter\snew\s*\spassword:* %n\n *Retype\snew\s*\spassword:* %n\n *password\supdated\ssuccessfully* .
	unix password sync = Yes
	syslog = 0
	log file = /var/log/samba/log.%m
	max log size = 1000
	dns proxy = No
	usershare allow guests = Yes
	panic action = /usr/share/samba/panic-action %d
	idmap config * : backend = tdb


[printers]
	comment = All Printers
	path = /var/spool/samba
	read only = No
	create mask = 0700
	printable = Yes
	browseable = No


[print$]
	comment = Printer Drivers
	path = /var/lib/samba/printers


[Share]
	comment = Shared Folder with everybody
	path = /home/sdu/share
	force user = nobody
	force group = nogroup
	group = nogroup
	read only = No
	create mask = 0777
	directory mask = 0777
	directory mode = 0777
	guest ok = Yes
sdu@ubuntu:~$
Using
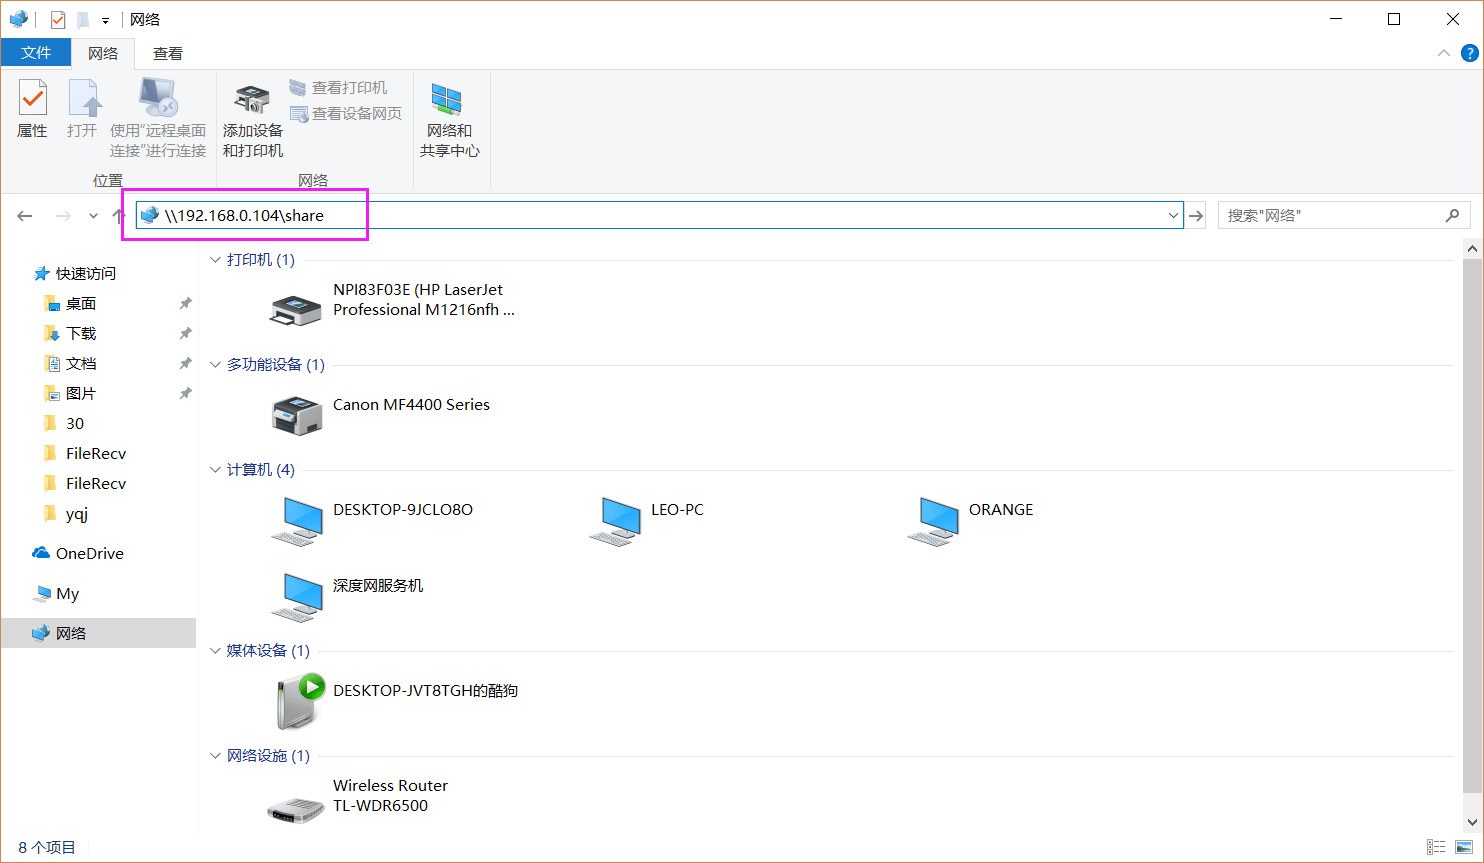
- 打开windows文件资源管理器,然后输入
\\192.168.0.104\share,轻轻回车即可👏
192.168.0.104 : 对应你linux的ip地址
share : 共享文件夹的名字
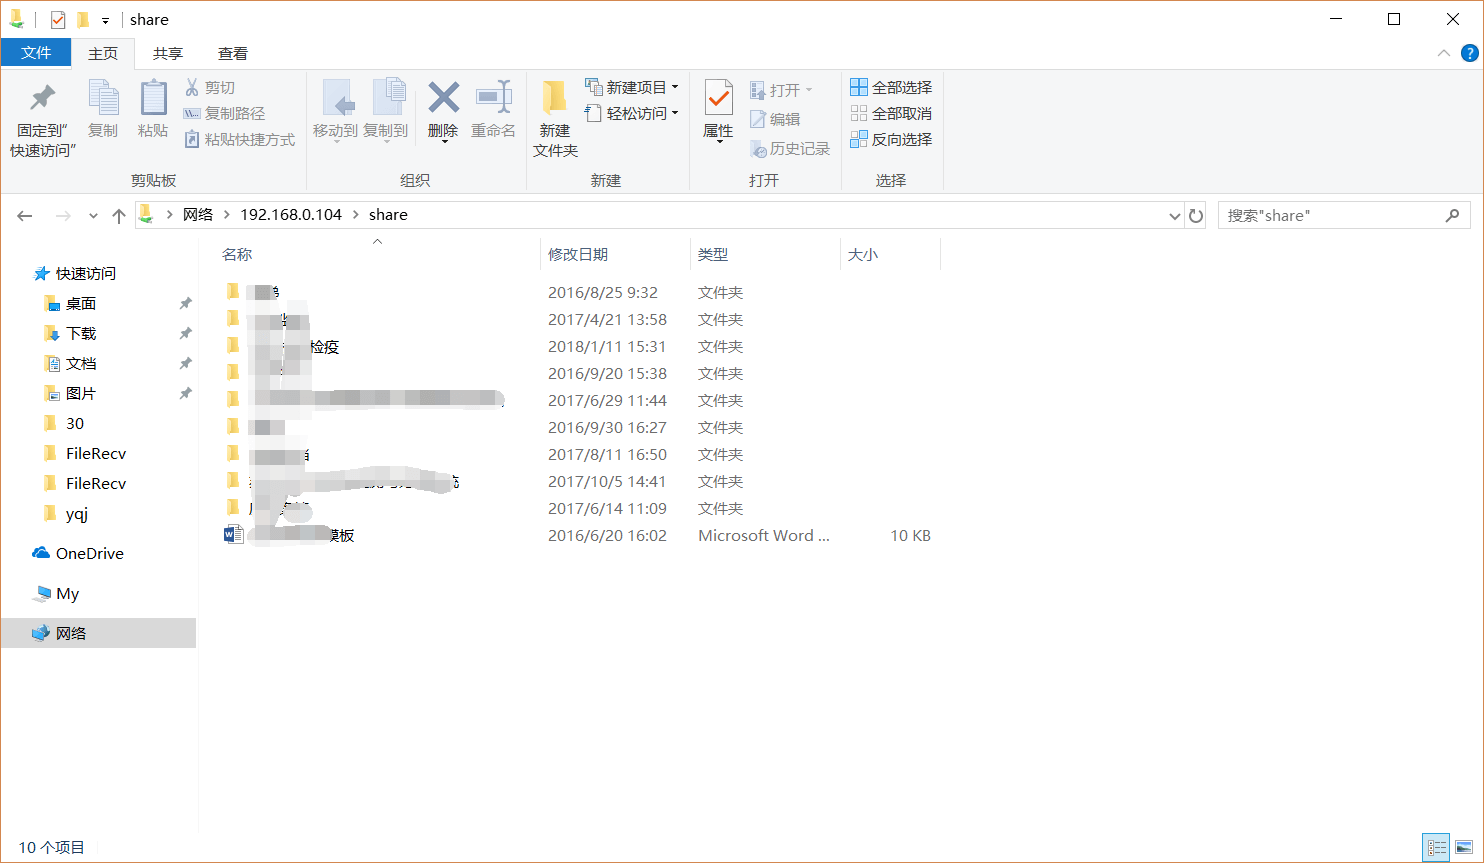
到此为止,如果大家一切顺利的话,Samba 就已经可以使用了💃
本文参考了 冰刃雪飘 编写的Wiki, 在此对
冰刃雪飘表示感谢👻
END!😜